How to mount your Blink Mini 2 security camera
The Blink Mini 2 offers an affordable way to keep an eye on your home. At just $40, you’d be hard-pressed to find a better value security camera. Besides capturing 1080p footage, you can set up custom motion zones, enable person detection, and change many other settings via the Blink mobile app. However, one of […]
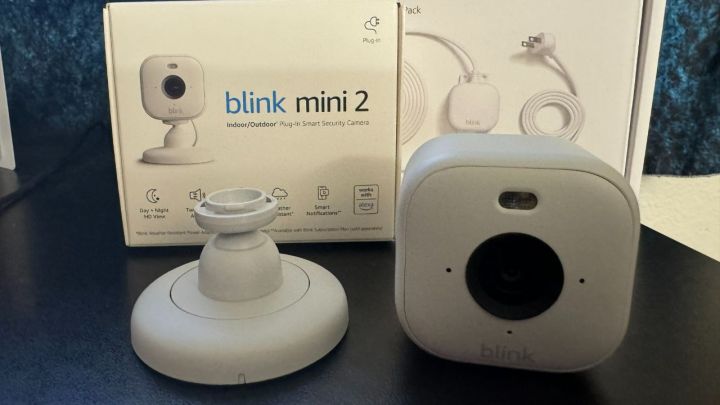
The Blink Mini 2 offers an affordable way to keep an eye on your home. At just $40, you’d be hard-pressed to find a better value security camera. Besides capturing 1080p footage, you can set up custom motion zones, enable person detection, and change many other settings via the Blink mobile app. However, one of the best parts about the Blink Mini 2 is that you can mount it on a wall or ceiling for better visibility. It also comes with a base stand for tabletop use.
Not sure how to mount your camera or afraid of breaking the plastic mount in half when removing the camera? Here is more detail on how to mount the Blink Mini 2 and remove it from its support.
Jon Bitner / Digital Trends
how to remove the Blink Mini 2 from its holder
By default, the Blink Mini 2 will be pre-installed on its support. This allows you to manually pivot and rotate the camera to find the best viewing angle for your home. It also raises it off the ground by a few inches, ensuring your view isn’t blocked by nearby objects. However, if you want to remove it from the stand to make it more compact, Blink offers you this alternative. The process is simple, although it can be intimidating if it’s your first time trying the procedure. Here’s how it works.
Step 1: Hold the base of the support with one hand. Consider positioning the mounting pin between two fingers for added stability.
2nd step: Grip the camera with your other hand.
Step 3: Pull the mount and the camera in opposite directions.
Step 4: You will have to apply a little pressure, but the camera will eventually come off the mount. The process can also lead to unpleasant noises and plastic deformation. Don’t worry, this is normal and no damage will be caused to the product.
Step 5: That’s it! The camera is now removed from the mount. To replace it, simply align the camera with the mounting pin, apply downward pressure and it will snap back into place.
Flash 
how to mount the Blink Mini 2 on a wall or ceiling
The Blink Mini 2 includes everything you need to mount the camera to a wall or ceiling. Here’s how it works.
Step 1: Remove your Blink Mini 2 from its holder.
2nd step: Slide the outer plastic ring out of the bracket. This will reveal two screw holes.
Step 3: Determine where you want to place your camera (making sure there is an electrical outlet nearby for its plug), then use two screws to attach the mounting bracket to the wall or ceiling.
Step 4: Replace the outer plastic ring by aligning the notches on it and the mounting bracket. This shouldn’t require much effort, as the two are designed to fit together perfectly. If you apply a lot of pressure, try repositioning the outer ring to better align it with the notches in the mounting bracket.
Step 5: Attach your camera to the mounting pin.
Step 6: Plug the power cable into the back of your Blink Mini 2.
Step 7: That’s it! Depending on how you have the camera installed, you may need to dive into the settings menu and enable the Return video functionality. This can be found by selecting the More on the device tile in the Blink app. Then go to Device settings and find Video and photo. Here you will have the opportunity to Return video.
Editors’ Recommendations