How to Switch to a Local Account in Windows 11
Many thought Windows 10 would be the last major update to Windows Microsoft prefers that you be signed into an online account when using Windows 11. Most recently, this has included removing the official guide to switching to a local account in Windows 11. However, there are many reasons why a user may prefer to […]
Many thought Windows 10 would be the last major update to Windows
Microsoft prefers that you be signed into an online account when using Windows 11. Most recently, this has included removing the official guide to switching to a local account in Windows 11.
However, there are many reasons why a user may prefer to keep their PC offline, including privacy, security, or so that the PC can run particular equipment.
So if you want to use your Windows 11 PC as a local user, there’s a way to switch – and this handy guide will help you with everything you need to get started.
Switch to a local account
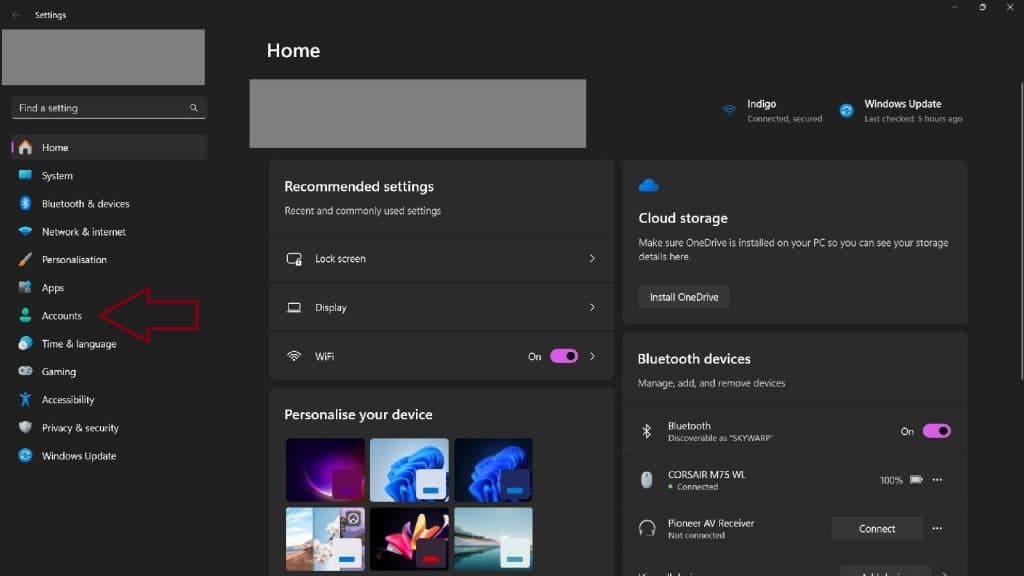
- Go to the Windows Start menu and click Settings
- Scroll down to Accounts
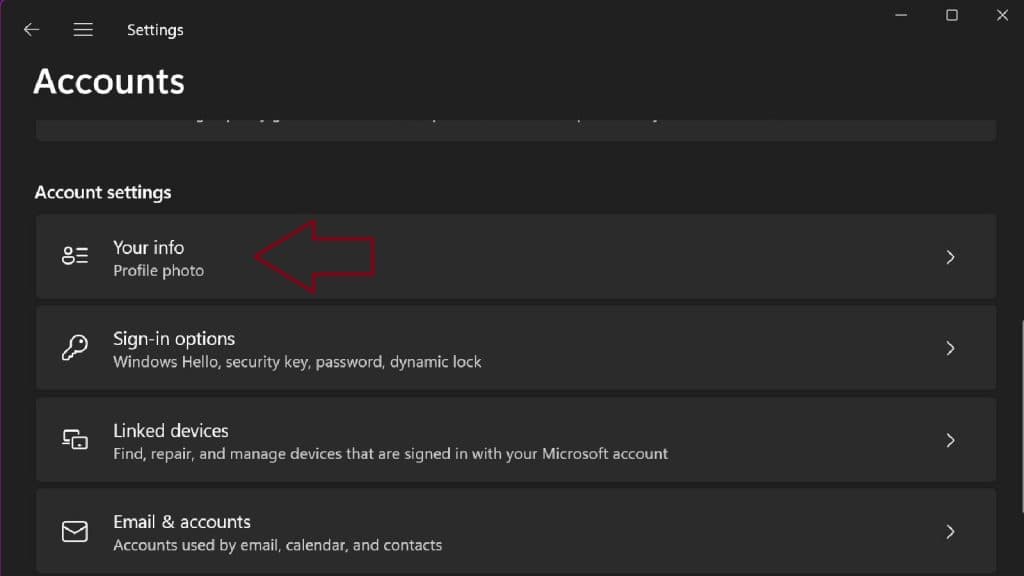
- Select Your information and select “Sign in with a local account instead”. This link will only appear if you are currently signed in with a Microsoft account.
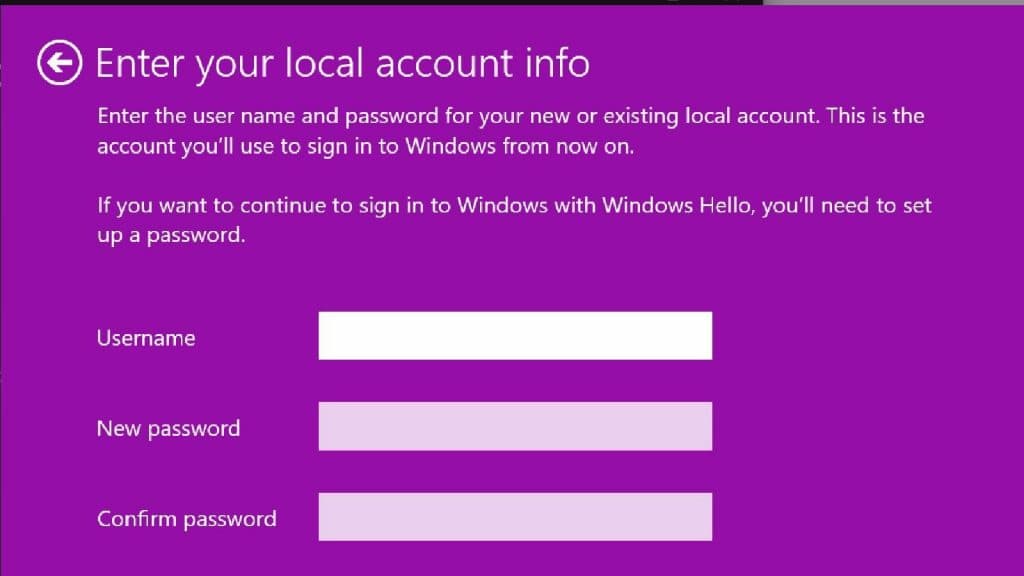
- Enter a username, password, and password hint. You must use a username that is different from all other usernames registered on the device.
- Click Next
- Select “Sign out and end”.
- Log in again using your new local account.
You will now be able to use Windows 11 locally, without needing to be signed in using your Microsoft account.
This can be used to take PCs offline under varying usage conditions or for an extended period offline when traveling. This also prevents Windows from trying to automatically save everything to OneDrive. Unlike CoPilot, this process does not require any additional software or RegEdits.