How to alphabetize data in an Excel spreadsheet
Manually organizing data in Microsoft Excel is very painful. This is why we do not recommend doing this. A simple task, learning to sort alphabetically in Excel, is not necessarily as intuitive as one would like. Here’s how to sort things in logical alphabetical order. Using the Alphabet Buttons The easiest way to sort alphabetically […]
Manually organizing data in Microsoft Excel is very painful. This is why we do not recommend doing this. A simple task, learning to sort alphabetically in Excel, is not necessarily as intuitive as one would like. Here’s how to sort things in logical alphabetical order.
Using the Alphabet Buttons
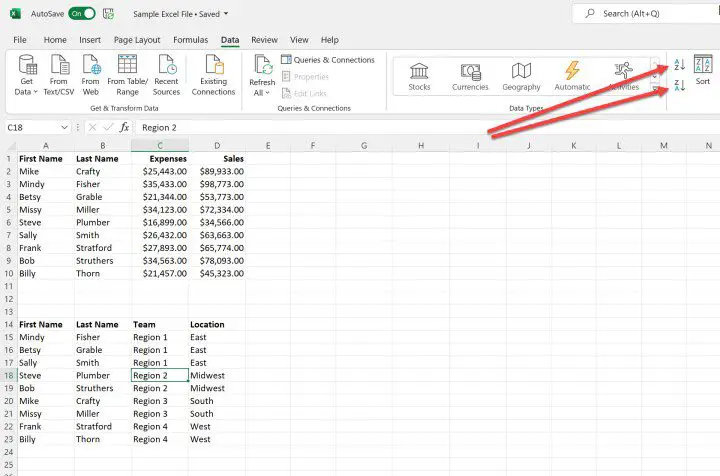
The easiest way to sort alphabetically in Excel is to use one of the simplified sort buttons located under the Data tab in the menu at the top of the worksheet. This is very useful when you want to organize Columns in alphabetical order. Continue reading on the Sort for a better idea of how to organize rows in Excel alphabetically.
Step 1: These buttons default to an AZ or ZA sort order and can either sort a single column or sort multiple columns in a table. In the latter case, the tool sorts by default according to the leftmost column.
Image used with permission of the copyright holder
2nd step: To sort using one of the buttons, select your column or table. In this case, we use the second table from the example spreadsheet.

Image used with permission of the copyright holder
Step 3: Click it AZ button. This will sort the table alphabetically by the contents of the First name column. You can also sort in reverse order using the Z.A. button.

Image used with permission of the copyright holder
Alphabetize using the Sort command
If you want more control over how your data is alphabetized, use the option Sort order. This will even allow you to sort rows alphabetically in Excel.
Step 1: Select your table then click on the Sort button. This will open the Sort dialog box. By default, the tool will sort by the leftmost column in order from A to Z, and it will assume that you have data headers that should be used in the sorting process. If you don’t have headers, deselect My data has headers.

Image used with permission of the copyright holder
2nd step: Click it Possibilities button. Here you can choose whether your data is case sensitive and whether it should be sorted top to bottom or left to right.

Image used with permission of the copyright holder
Step 3: In our example, we will sort by Location and then by Surname. To do this, we will select Location first sort by drop-down box. Then we will click Add a level to select Surname in the drop-down list. You can also use the Delete level And Copy level options if necessary.

Image used with permission of the copyright holder
Step 4: Click on ALL RIGHT when you have completed your selections. Your data will now be sorted by Location first, then Surname.

Image used with permission of the copyright holder
To learn more about using Excel, see our guide on how to password protect an Excel file.
Editors’ Recommendations