How to Apply and Clean Thermal Paste
If you’re building a computer, you need thermal paste, or thermal paste, to ensure that your computer’s processor doesn’t overheat. This is a silvery, gooey material that you inject between the CPU and cooler to fill all the microcavities on their surfaces, allowing for more efficient heat transfer from the CPU to the cooler. The […]
If you’re building a computer, you need thermal paste, or thermal paste, to ensure that your computer’s processor doesn’t overheat. This is a silvery, gooey material that you inject between the CPU and cooler to fill all the microcavities on their surfaces, allowing for more efficient heat transfer from the CPU to the cooler. The best thermal pastes work so well that they make your CPU run harder and faster, at lower temperatures, making your PC quieter.
You also need to replace the thermal interface material every few years, so if you haven’t opened your PC in a while, it might be time to give it a spring cleaning. Keep reading to learn how to apply heat paste and how to clean it. Additionally, we’ll cover other aspects of its use, such as how often you should reapply it and whether there are any alternatives to using heat paste.
Bill Roberson / Digital Trends
how to apply thermal paste
If your CPU and cooler are clean and ready to go, we can directly apply new thermal paste. If they’re not clean and have old thermal paste, scroll down to the section on how to clean your CPU first.
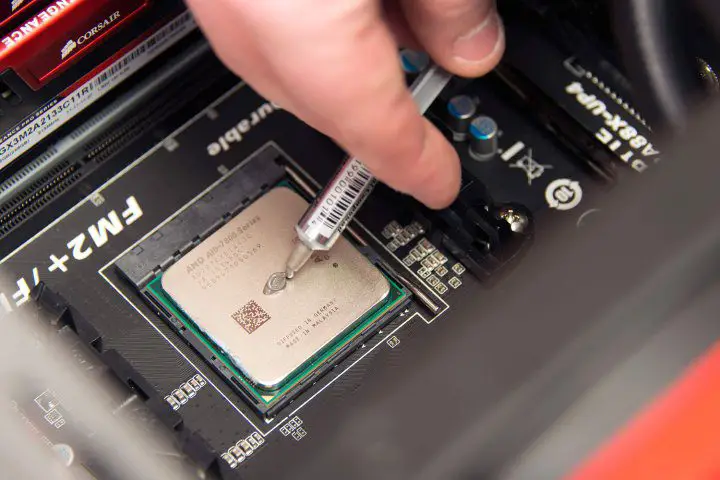
The key to applying thermal paste is not to overdo it; Just use a small, pea-sized piece of dough – any extra amount would be excessive. However, as long as you don’t use conductive thermal paste, using too much won’t break anything, it will just be messy and, in extreme cases, can make your cooler less efficient.
Step 1: Install your CPU into the motherboard if you haven’t already, then use the plunger of the thermal paste tube to inject a pea-sized amount into the center of the CPU.
2nd step: Next, install the CPU cooler while applying downward pressure on the unit. Note that it is not necessary to roll out the dough before installing the cooler; the pressure of the cooler will evenly distribute the thermal paste.
Step 3: Once the cooler is installed, check the edges of the CPU to see if any excess thermal paste has spilled over and, if necessary, wipe it with a microfiber cloth or paper towel.
Amazon 
how to clean heating paste
If you already have a working machine that requires reapplying thermal paste, you will need to clean off the old thermal paste first. Before you begin, make sure the CPU cooler has been removed and you can visually see the thermal paste; it is usually white or gray.
Step 1: Start by wiping down the top of your processor with the microfiber cloth to remove as much thermal paste as possible without issue.
2nd step: Place the microfiber cloth over the end of the isopropyl alcohol bottle and invert it until some of it has saturated the cloth, then wipe the processor until all the old thermal paste has been eliminated.
If you wish, you can use cotton swabs dipped in isopropyl alcohol to remove any hard-to-reach bits of heat paste, but this is not required.
Step 3: Repeat the process above to remove any old thermal paste that may be stuck under your CPU cooler.
Step 4: You can now move on to applying new heat paste as outlined in the section above.
How often should you apply the heating paste?
It’s up to you, as some leave their heating paste on for years without much trouble, and some replace it every year. Intel recommends reapplying the solution “every few years” or if you remove your cooler for any reason. Typically your thermal paste will last you a while, but keep an eye on your temperatures because if they start to rise it could be a sign that your thermal paste is drying out.
Need help with this? Here’s how to check your CPU temperature.
Thermal Grizzly 
Should you use heating paste?
Yes, kind of. You must have something To fill the gaps between the cooler and the processor, heating paste is the most common and effective solution. However, if you don’t want to reapply heat paste at least once every two years, you can opt for a heat pad.
Thermal pads do the same job as thermal paste, but they are a malleable material with high thermal conductivity. This allows them to efficiently transfer heat from the CPU to the cooler, but without the risk of drying out or degradation, so performance should remain the same for years to come. They don’t tend to perform as high as the best heating pastes, but for peace of mind and ease of use, they win hands down.
Want to upgrade your CPU cooler while reapplying thermal paste? Here are our favorite AIO water coolers for easy installation.
Editors’ Recommendations