How to draw in Microsoft Word
Microsoft Word is packed with features and formatting options. It also offers many ways for users to add shapes, diagrams, and other visual elements to traditional word processing templates. Unbeknownst to many, you can even draw and sketch in Word. Whether you want to draw attention to a certain part of your document or simply […]
Microsoft Word is packed with features and formatting options. It also offers many ways for users to add shapes, diagrams, and other visual elements to traditional word processing templates. Unbeknownst to many, you can even draw and sketch in Word. Whether you want to draw attention to a certain part of your document or simply add a touch of style, this guide will teach you the ins and outs of drawing in Microsoft Word.
how to draw a shape in Word
When some people think of the word “draw,” it conjures up images of creating shapes, lines, and similar objects. Rather than trying to create perfect circles or squares yourself, you can use Word’s shape feature.
Step 1: Open your Word document and place your cursor where you want the shape.
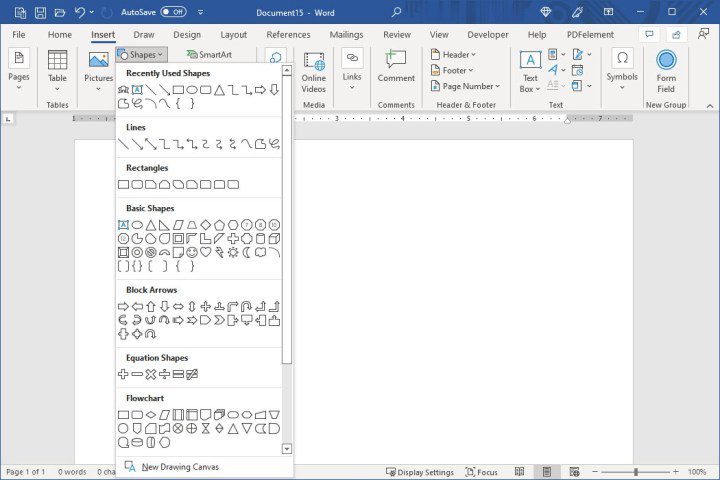
2nd step: Go to Insert and click on the tab Shapes drop-down arrow.
Step 3: You will see a wide variety of shapes that you can insert. From lines and arrows to rectangles and stars, you’ll find the most common shapes in the list.
Select the shape you want to draw.
screenshot / Digital Trends
Step 4: Your cursor will change to a crosshair symbol. Click on the document, drag to create the shape, and release when finished.

screenshot / Digital Trends
Step 5: You can move the shape by selecting and dragging it. You can also resize it by dragging it in or out from a corner or edge.
For additional customizations, select the shape and navigate to Shape Format tongue. You’ll see various tools for styling the shape, such as adding a fill color or using an effect like a shadow or bevel.

screenshot / Digital Trends
how to Draw Freehand in Word
Another way to create your shapes and lines in Word is to use the freeform options. You can create a freeform or a scribble.
Step 1: Place your cursor in your document where you want to draw.
2nd step: Go to Insert and click on the tab Shapes drop-down arrow.
In the top section of the list, you will see two options that you can use. Select Free form: form to create your own shape or Free form: scribble to sketch any type of drawing.

screenshot / Digital Trends
Step 3: If you use the Free form: form tool, you draw the shape and return your cursor to the starting point of the drawing. This essentially connects the points to create the shape.
With the Free form: scribble tool, you can draw whatever you want without connecting the start and end points.

screenshot / Digital Trends
Step 4: When you’re done, your drawing is in its own space, just like when you draw a specific shape above. This allows you to drag it if you want to move it or drag it in or out of a corner or edge if you want to resize it.
You can also select your drawing and use the tools on the Shape Format tongue.

screenshot / Digital Trends
how to use drawing tools in Word
Another way to draw a picture or sketch in Word is to use the tools on the Draw tongue.
Step 1: Meet at Draw and select a tool at the top. You can choose from different pens, a pencil, a highlighter or the Action Pen tool. You will also notice an eraser to perfect your drawing.

screenshot / Digital Trends
2nd step: To choose a color for your drawing tool, select the tool, then click the arrow that appears in the lower right corner. You’ll see a palette of colors you can choose from, as well as line weights.

screenshot / Digital Trends
Step 3: If you want a specific color that you don’t see, select More colors then select a shade or enter the RGB or HEX code for the desired color.

screenshot / Digital Trends
Step 4: Another option on the Draw tab is to use a Drawing canvas. Click this option in the ribbon to create a specific area for your sketch, then draw inside it.

screenshot / Digital Trends
Step 5: When you have finished your drawing, select the large Arrow icon in the ribbon, on the left side, to move or resize your drawing.

screenshot / Digital Trends
No matter what type of picture you want to draw, whether it’s something detailed with your artistic skills or something simple like your initials or a smiley face, now you know how to draw in Word with its useful features and practical tools.
For additional help, learn how to delete a page in Microsoft Word.
Editors’ Recommendations